How To Paint A Nursery Mountain Mural In 7 Easy Steps
Are you looking for tips on how to paint a DIY nursery mountain mural for your baby? Check out this design which you can recreate in 7 easy steps!
If you have been scrolling Pinterest for ideas to make your baby’s nursery special then you will love this DIY Nursery Mountain Mural tutorial.
This nursery mural project is perfect if you want to makeover a nursery, or playroom, or add an accent wall.
It does not require any skills other than painting. The lines you create using the blue tape will help you with the “artist” part.
So if you are thinking that you are not an artist and can’t draw TRUST ME you can do this project!
This is a fun and easy DIY project that you can complete in a weekend.
This post is all about how to paint a DIY Nursery Mountain Mural in 7 easy steps.
READ MORE>>> Home Design Inspiration On Inspired Design Talk
How to paint a nursery mountain mural in 7 easy steps
Here is how to create a nursery mountain mural in 7 easy steps:
- Tape The Mountain Design
- Go Over The Tape With a Damp Cloth
- Paint Foreground Mountains
- Pull Off Tape and Fill In Gaps
- Paint Second Color (Medium)
- Paint Third Color (Lightest Shade)
- Add The Snow Caps
Nursery Mountain Mural Supply List
This post may contain affiliate links, which means that if you make a purchase, I might make a small commission at no extra charge to you. Please read my full disclosure here. As an Amazon Associate, I earn from qualifying purchases.
I used leftover grey paint from other room projects but as long as you have three complementary colors you’re good to go. If you want a more colorful mural you can use tints or shades of blue, sage, or even pink.
Be creative and follow your intuition. There’s ALWAYS more than one way to paint a mural and the best ones are a combination of ideas.
Here’s what I used:
DIY Nursery Wall Paint Colors
- Wall Paint (3 colors):
- Dark gray: Benjamin Moore Silver Gray 2131-60 (eggshell finish)
- Med gray: Benjamin Moore Classic Gray OC-23 (eggshell finish)
- Light gray: Benjamin Moore Horizon OC-53 (eggshell finish)
- Metallic Silver: (for the mountain peaks)
- Good Quality Painter’s Tape – I have had great results using this brand
- Damp Washcloth – Any washcloth that you have in your home is fine!
- Paintbrush & Rollers:
- Paint Roller love this brand for doing the large mountains
- Any of these small foam rollers and a tray for smaller mountains
- Paintbrush (my favorite brand)
- A fine paintbrush like this for any touch-ups needed
ProTip: Wrap your new roller with blue tape to remove any loose lint before your first use.
I’ve been obsessed with Purdy rollers and brushes for quite some time. This is one place you should not skimp when painting. They’re super durable and of awesome quality.
A few painting tricks I learned from the pros are:
- Wrap the roller in plastic wrap or a plastic bag and it’ll be ready for the next time you paint. I used to either wash the roller or throw it out after each use. This tip will save you time and money.
- The pro painters throw the used roller into the 5 gallon paint bucket to save it for the next day. They take it off the roller frame and then let it float in the paint bucket. I usually do the plastic bag method over this because it’s a little neater.
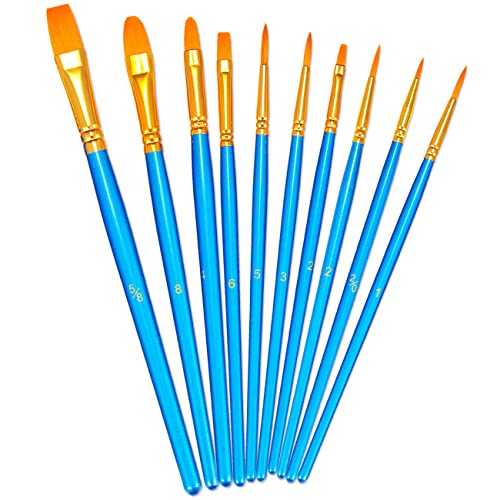
When it comes to the brushes get both a 2 1/4″ and 3″ so that you are covered no matter the area you are painting. For tighter areas with more grooves the 2 1/2″ is better but for large surface areas the 3″ is perfect.
The small brushes are awesome for touch-ups and detailed areas.
Nursery Budget Worksheet
Your nursery budget will start to add up quickly. This DIY mural is a great way to make an impact while sticking to a budget.
To help you stay on track I created this Nursery budget worksheet. Mix high and low furniture and decor if you plan to have multiple kids. This way you know it’ll last.
If this is a one-and-done type situation then Target, Wayfair, and Walmart have fabulous affordable nursery decor. Find a high-end design you love and then substitute the pieces to work within your budget.
DIY Nursery Mountain Mural Tutorial
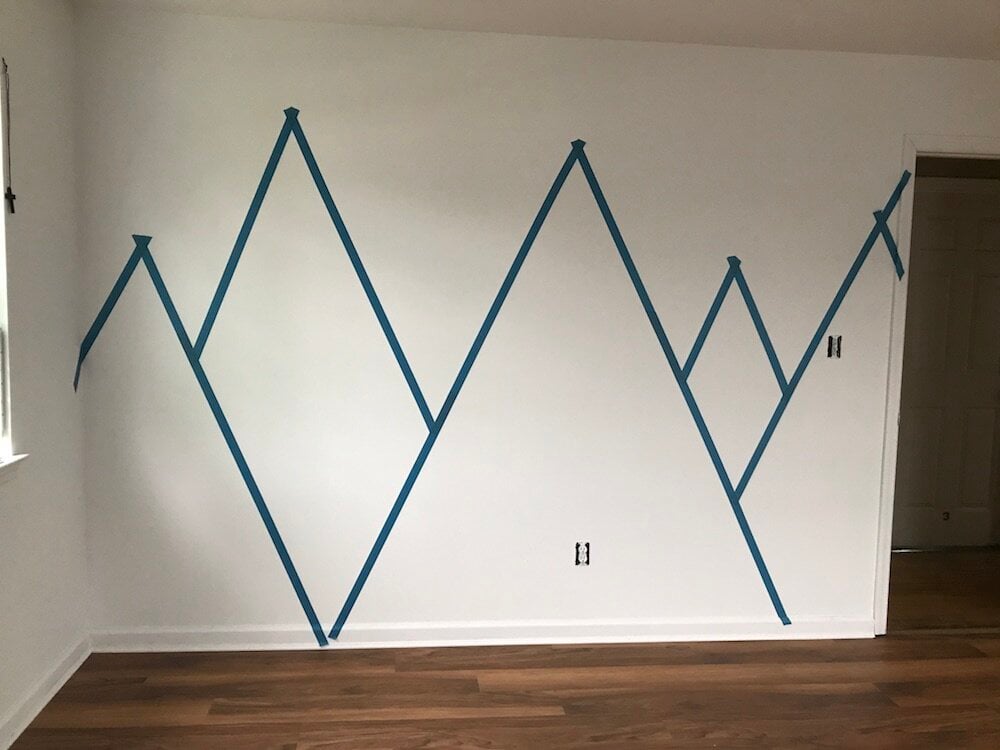
Step 1: Tape The Mountain Design
For the mountains mural design I created, I used three shades of gray. Each shade was used in two sections of the mural.
I didn’t tape out the cloud shape because it had curved lines so I free-form drew that.
At the bottom of the mountains where two meet, you need to trim the tape so you don’t have overlapping pieces that go down to the floor.
Use scissors to get a precise line with your tape.
You’ll want to use quality painter’s tape such as 3M scotch blue painter’s tape. If not you’ll be sorry when you remove the tape because it may damage your paint job.
Step 2: Go Over The Tape With a Damp Cloth
One trick I learned to ensure that the tape gives the crispest line possible, is to go over it with a damp cloth. The wetness activates an element in the tape glue.
I went over all the tape with a damp cloth before painting because I wanted my lines to be super crisp.
The other option is to edge the tape with the ground paint color (in this case white). This creates a seal so if the paint bleeds underneath the tape it will be the ground color, not the contrast mountain color. This creates crisp lines when you remove the tape.
Be sure to let this dry before applying the mountain color.
Related Post: 9 At Home Baby Shower Printables You’ll Love (Easy DIY Baby Shower Favors)
Step 3: Paint Foreground Mountains
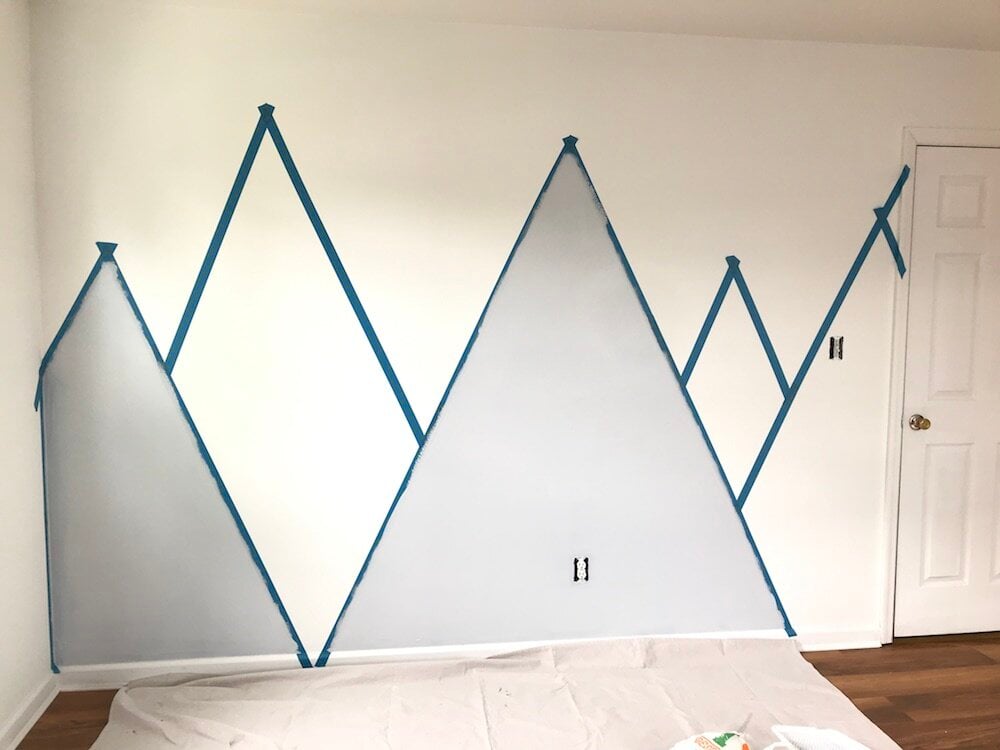
For this design paint the front mountains in the darkest gray color. Apply two coats of paint, about an hour apart, and let dry.
Step 4: Pull Off Tape and Fill In Gaps
After about an hour of dry time, you can pull off the tape at an angle.
Removing the tape when it’s partially dry (not fully cured) is best. This will protect your job and create crisp lines.
Fill in any gaps after the tape is removed if needed.

Step 5: Paint Second Color (Medium)
Next, do the second paint color and follow the same process. I waited several hours (4-6) to let the first color dry before starting the second color.
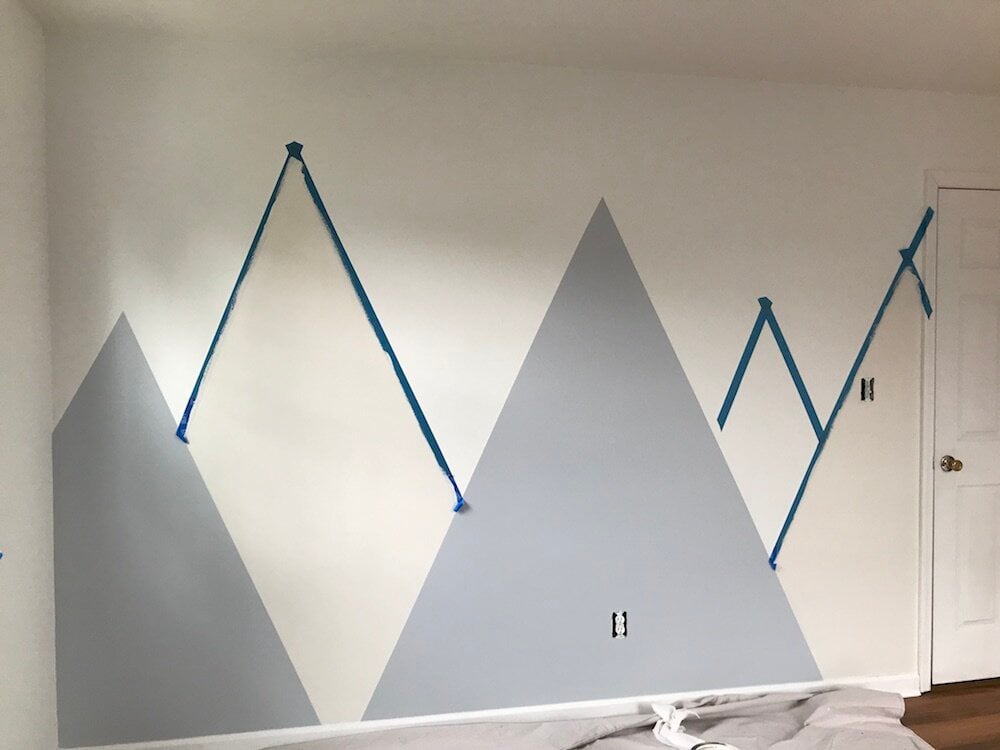
For crisp lines apply tape along the edge of the dark gray (foreground mountain mural color). As long as the paint is dry and you use delicate painter’s tape you should not damage the dark mountains.
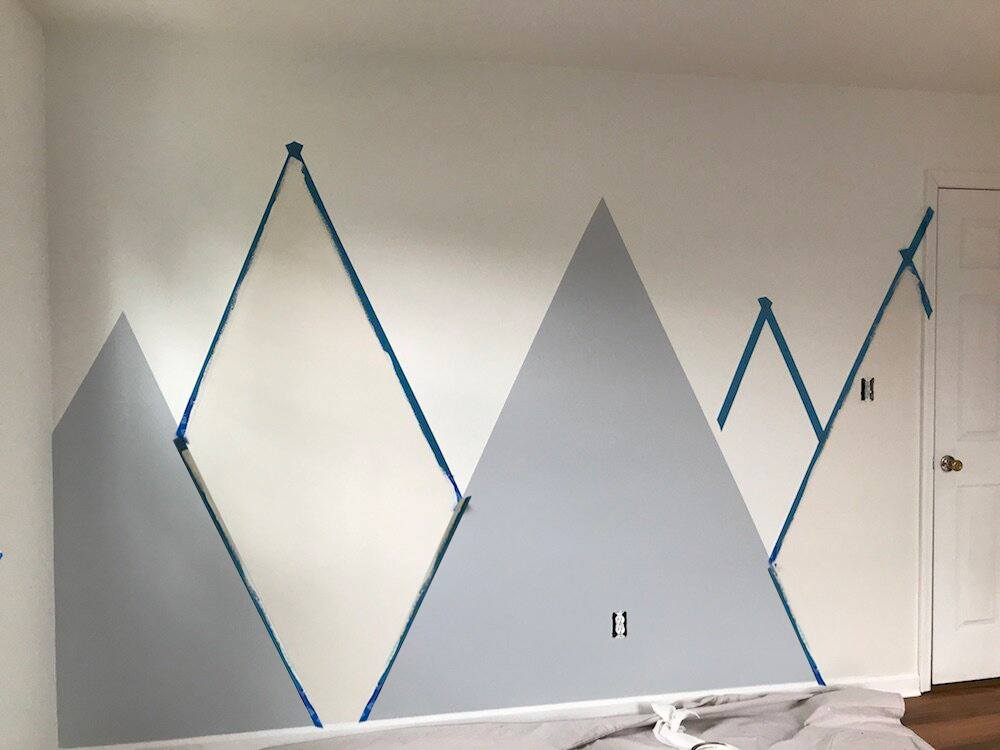
As soon as the second coat of the second (medium) paint color is painted remove the painter’s tape from the foreground (darkest color) mountains.
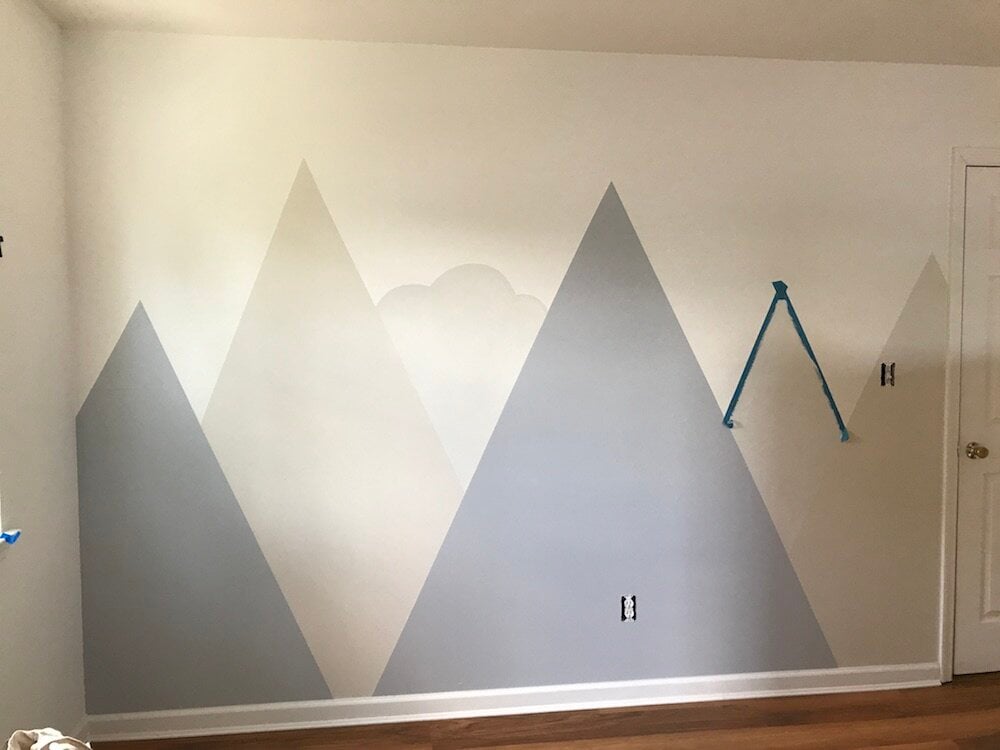
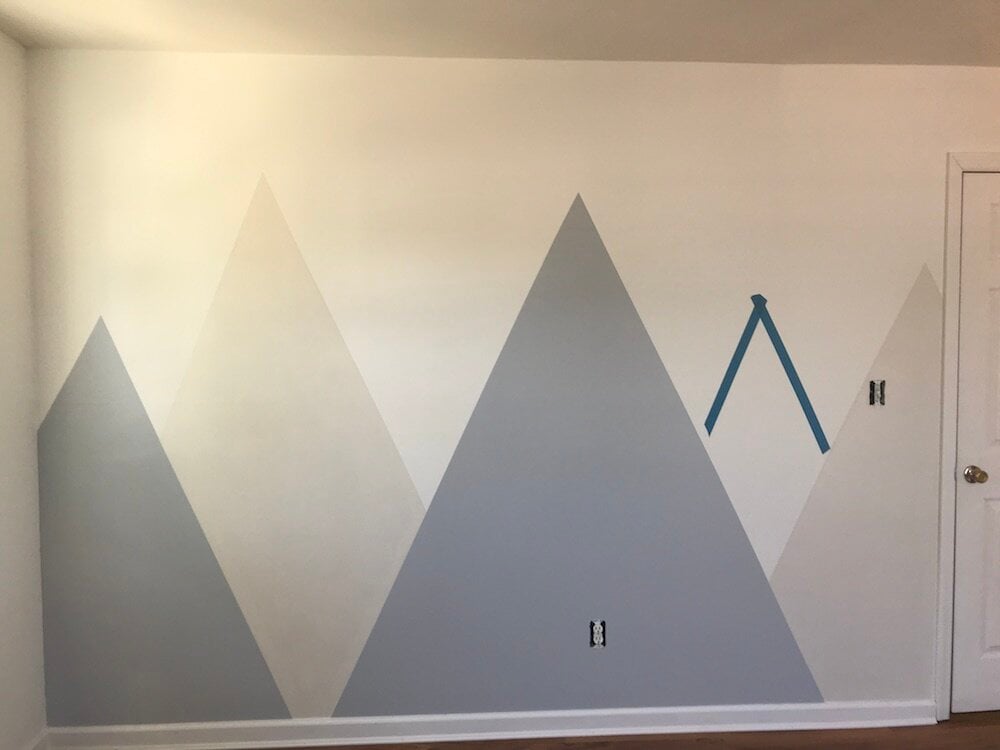
The below image is after the tape was removed from the foreground mountains (darkest color).
The next image shows the tape removed from the second (medium color) as well.
Related Post: How To Paint Kitchen Cabinets Yourself
Step 6: Paint Third Color (Lightest Shade)
Apply the third color (two coats).
For the cloud, tape off the edges of the neighboring mountains (medium color) and then free-form draw the cloud.
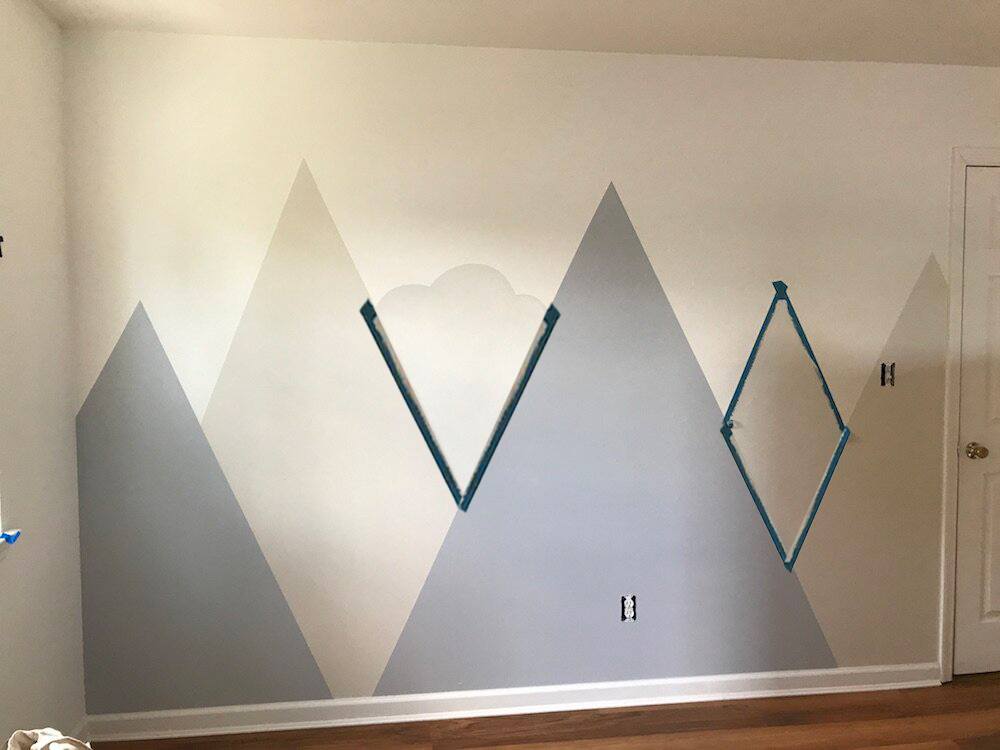
The below image shows after the tape was removed from the neighboring mountain edges.
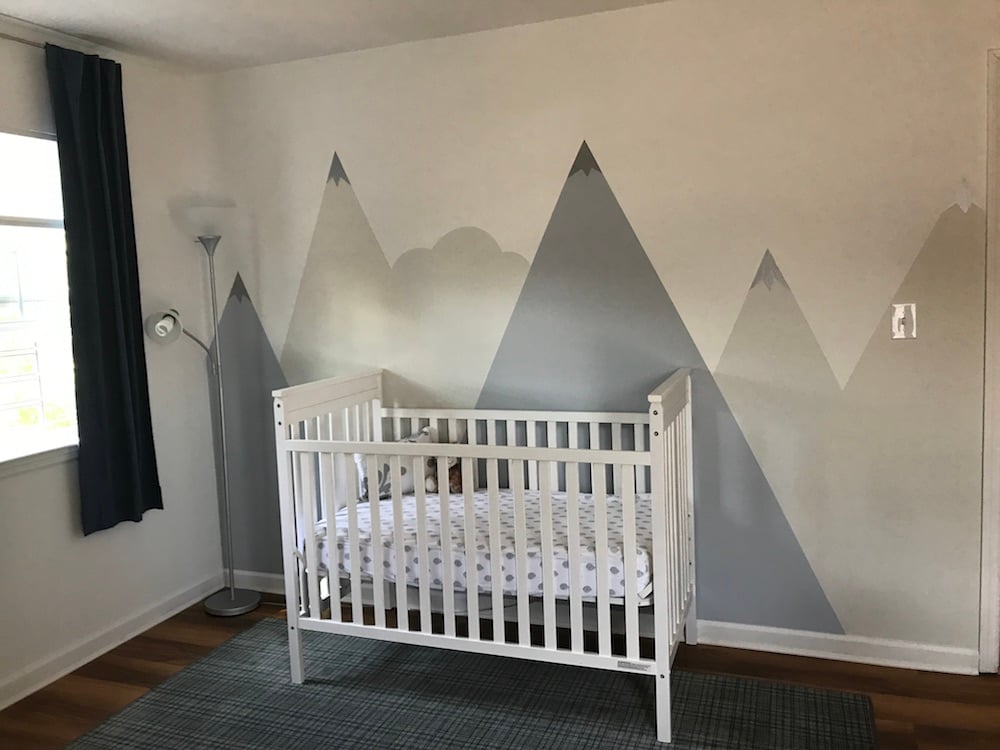
Step 7: Add The Snow Caps
I used metallic paint for the tips of the clouds. Again tape off the edges and apply the metallic paint.
The below image is after the tape was removed from the snowcap area.
Enjoy The Finished Nursery Mountain Mural!
There’s no better feeling than the completion of a successful DIY nursery mural project!
Decorate Your Nursery
Once your mountain-themed nursery mural is complete you can bring in the furniture and decor that’ll add the finishing touch to your nursery design.
Here are a few links to help you get started.
Nursery Mountain Mural Inspiration
Depending on the color you use this project can work for a boy, girl, or gender-neutral nursery.

Here’s more inspiration to give you ideas.
I hope this was helpful and gives you the confidence to try this project in your nursery.
Other Posts You’ll Love:
- The 13 Best Dollhouse Gift Ideas Kids Will Love
- Benjamin Moore Classic Gray Home Inspiration
- Best IKEA Curtain Hack (TikTok Made Me Do It)
Last Updated on August 14, 2024 by Nicole DelaCruz


