How to Install Rubber Gym Flooring (9 Simple DIY Steps)
Are you wondering how to install rubber gym flooring in your home? Learn how we installed our home gym flooring in 9 easy steps!
This post may contain affiliate links, which means that if you make a purchase, I might make a small commission at no extra charge to you. Please read my full disclosure here. As an Amazon Associate, I earn from qualifying purchases.
If you’ve been thinking about adding an exercise room but are not sure about the rubber gym flooring installation, this is for you! We recently converted a spare bedroom on the second floor into a personal gym and could not be happier.
After doing a ton of research we purchased the rubber home gym flooring and installed it ourselves. It was surprisingly very easy and totally a DIY project anyone can do. Yes, even YOU!!
The beauty of having an at-home gym is we can exercise any time we want without having to travel. As a result, there is no excuse why you can’t exercise!
If you need tips and advice on installing your exercise room flooring see below for all the details.
This post is all about How to Install Rubber Gym Flooring in your home.
READ MORE>>> Home Design Inspiration On Inspired Design Talk

How to Install Rubber Gym Flooring In 9 Steps
Here are the How to Install Rubber Gym Flooring Steps we took:
- Empty The Room
- Gather Your Supplies
- Separate Your Tiles
- Lay The Protective Lining
- Start In A Corner
- Connect Tiles
- Cut Around Obstructions
- Trim Lining Material
- Enjoy The Finished Product
Continue reading for more details on each of the home gym flooring installation steps.

Home Gym Flooring
The rubber gym flooring we ordered was from Flooringinc.com. It arrived earlier than expected and the delivery was flawless.
The 22 tiles weighed 525 lbs. Crazy I know!
My husband carried the tiles up to the second floor two at a time. Remember we decided to move the unfinished basement gym equipment up to a spare room.
Through my research, I learned that when you have a gym on the second floor you need to make sure the floor joists can hold the equipment. It is also recommended that the equipment be placed around the perimeter of the room.
Check out this article for more details. If you’re installing a gym in a garage or basement this is less of an issue but I wanted to point it out. I don’t think the typical home gym is located on the second floor but for us, it’s the BEST option.
It took A LOT of manpower but a leg machine and bench press were successfully relocated after the rubber gym flooring tiles were installed.

Above is the previous home gym situation that was on a concrete surface. The space was never finished and to be honest, it wasn’t very inspiring.
Home Gym Rubber Floor Plan
Here’s a visual of what our second-floor home gym layout will be. I measured the room and created a floor plan with the rubber gym flooring tiles.
This made it easy to order the exact amount of rubber flooring. These images were also sent to the rep who confirmed the amount we needed.


The first image helped calculate exactly how many gym flooring tiles we needed to purchase. We ordered the 1/2″ Tight-Lock Tiles in Tan from Flooringinc.com.
The color you choose for your rubber gym flooring will make a difference in your space. I love the look of black especially solid black BUT I learned in this process it’s not the best choice.
If you do not like to see the seams in the tiles or roll you do not want solid. The fleck rubber flooring is made from recycled parts of solid tiles to help the environment. Also, the fleck tile will hide dirt and shoe markings much better than the solid black.
In my opinion, the best gym flooring would be the fleck product if you want to hide dirt and seams. If you’re super clean and seams don’t bother you, solid gym flooring tiles would be okay.
Where To Buy Home Gym Flooring
There were so many home gym flooring tiles to choose from but I LOVE the 1/2″ Tight-Lock Tiles we went with. When I went through the process of sourcing the rubber gym flooring tiles I searched high and low.
My favorite retailers for home gym flooring are the following:
This roundup has other options you can look into as well.

Best Rubber Gym Flooring Tiles

How to Install Rubber Gym Flooring Video
1/2″ Tight-Lock Tiles
This is the exact rubber tile we have in our home gym.
I went back and forth on whether to go with the gray fleck or tan but in the end, went tan. We have wood roman shades and the natural hardwood floor so the tan looks richer with both those elements.
It’s a bright golden tan so it’s very pretty in person. The beauty of this online resource is you can order free samples to see your selections in person.
The tiles are 3″ x 3″ interlocking and cut with a laser knife. As a result, the seams are not very visible.

Home Gym Flooring Rubber Tile Cost

Above is the exact workout room flooring I ordered plus the cost with tax and shipping. The shipping cost is very high because of the weight of the rubber gym flooring tiles.
For our application, we did not need to glue the rubber gym tiles down so other than the cuts around the closet it was pretty easy.
If you are interested my reps information is: Margaret Black Email margaret.black@incstores.com
She is super knowledgeable and patient! Tell her Nicole DelaCruz sent you.
How thick should gym flooring be?
We chose the 1/2″ rubber thickness because it is recommended for weights over 75 lbs and deadlifting.
The 1/2″ thick hard rubber gym flooring is for dead and squat lifting where 75-100 lbs are dropped on the floor. This thickness will protect the floor underneath and absorb the shock and sound. If you were to drop 200 lbs on 8mm it would flatten out and not protect the floor.
8mm (5/16″) rubber thickness- recommended for up to 50 lb weights
3/8″ rubber thickness- recommended for up to 75 lb weights
Related Post: 15 Best Home Gym Floors You’ll Love In 2025
How To Install Gym Flooring Steps & Tips
1. Empty The Room
This may seem obvious but you really must clear out the entire room. The only thing you will want in the space is the supplies you will need to lay the floor.


Above is the before photo of the room. The walls were painted in Simply White OC-117 which is my new favorite color along with black and gold.
We left the wood shades from before which work nicely with the black and golden tan fleck rubber tiles.

2. Gather Your Supplies

Home Gym Installation Supplies
The exact supplies we used to lay the home workout room flooring are the following:


3. Separate Your Rubber Flooring Tiles
Since we had 2 corners, 10 centers, and 10 border gym floor tiles we made stacks of each. I followed this layout when installing the tiles. I did order one extra center tile just in case but we didn’t need it.

4. Lay The Protective Lining
How to Install Rubber Gym Flooring over wood floors.
When applying the home gym flooring over hardwood (which we did) you need to put down a thin barrier of plastic so the wood does not stain.
This is recommended so the rubber tile does not come in direct contact with the wood floor. You can use the barrier product they sell in-home stores or my rep even mentioned using plastic tablecloths.
We used this plastic vapor barrier to protect the wood floor.

The other option would be to use craft paper like this to protect the hardwood underneath the rubber flooring.

You want the craft paper (or plastic) because the black coloring or rubber mats and rolls can seep into hardwood, staining the material. The protective layer will keep the hardwood protected from staining so you have a gorgeous surface if you decide to remove the rubber.
This article has a lot of information on other flooring applications.
This is the room after we laid the plastic layer.

We put the plastic down in two sections and smoothed it out.
5. Start In A Corner
How to Install Rubber Gym Flooring in your home gym.
After the plastic was laid down we started in the far corner along the straight wall. The cuts would be done along the radiator wall. That way if anything was slightly off the radiator would cover it.

You can see that the first corner tile was laid down over the plastic protective layer. It may seem like it would be difficult to lay the thick rubber gym flooring over the plastic but it wasn’t.
Since the tiles are heavy they flattened the plastic out as we went along.
6. Connect Tiles
After the first rubber tile was placed we then smoothed out the plastic layer. We continued to lay out all the border tiles with a straight edge.

Next, we filled in the center gym tiles and pressed down on the seams. We laid all the pieces down that did not require cuts.
How To Cut Rubber Home Gym Flooring
We measured the space from the tile to the wall and marked the measurement on the rubber tile using a white pencil. After we used the straight-edge blade to trim the tile.


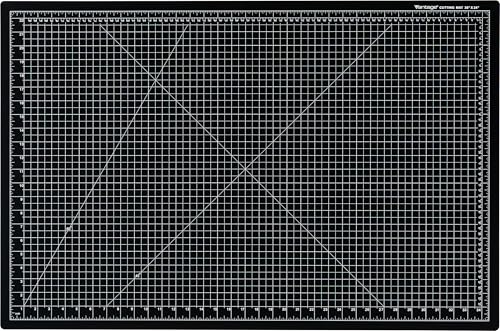
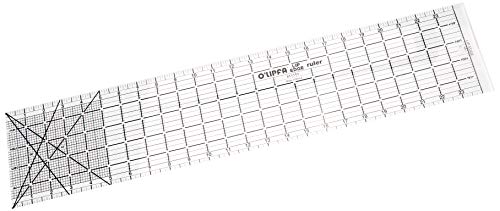
Here you can see my husband placing the t square ruler next to the pencil line. He scored the rubber tile several times to ensure a straight cut.
After he picked it up and sliced through the remaining area of the tile. It was a process and we took our time. We followed the saying measure twice cut once.
Pro Tip: Measure Twice Cut Once
7. Cut Around Obstructions
After we trimmed along the radiator wall we had to cut around the closet. I took my time here so I did not make any mistakes. It was better to cut short and then trim extra. You can always take off more but can’t add on.

The hardest area was at the entrance and closet wall above. Since the wall has molding some areas needed an angle cut.

The white pencil lines above show all the cutouts for this tile. I did go back in and trim a little off but it was not hard.
8. Trim Lining Material
At the two walls next to the first corner tile, I lined up the plastic liner with the wall. Along the radiator wall, I trimmed the plastic down with the blade.
The closet was the hardest area to trim, but again I cut off a little at a time.

You can see in the shot above how the plastic looked once trimmed around the closet wall.
It’s important to note that trimming the plastic liner does NOT need to be perfect. If you have some jagged spots no worries the rubber tile will cover that up.
9. Enjoy The Finished Product!
Here is the finished product after all cuts were made. This is the last of the How to Install Rubber Gym Flooring steps.

We’re so happy with how it came out!

Above is what the other side looks like.
Related Post:23 Amazon Yoga Equipment Finds That’ll Get You Into Your Flow

This won’t last but I have been doing my yoga in the new gym since the equipment is not up yet.
Here is that classic shoe floor photo we all love so much!

I hope this post was both helpful and inspiring as you go through your home gym design process.
We’re so happy with how our home gym turned out.
This post is all about How to Install Rubber Gym Flooring in your home.
Other Posts You’ll Love:
- Benjamin Moore Classic Gray Home Inspiration
- Home Gym Inspiration That Will Make You Want To Exercise
- How To Apply Vinyl Decals Like A Pro In 9 Easy Steps
Last Updated on February 17, 2025 by Nicole DelaCruz