How to Draw a Floor Plan for Interior Design (Easy Guide + Tools)
Looking for advice on how to measure and draw a floor plan? Learn how to draw a floor plan, like a professional, in 9 easy steps.
When I went to design school my favorite professor repeated over and over that the floor plan was the road map for your design.
She said that before you can get to the “pretty” you MUST lay out the plan.
If you’ve been following along then you know I’m a strong believer in the importance of the floor plan. It’s crucial to make sure your furniture is the proper size and your traffic flow is efficient.
Whether you’re doing a complete room makeover or just in the market for a new sofa this post is for you!
This post is all about how to measure and draw a floor plan.
READ MORE>>> Home Design Inspiration On Inspired Design Talk

How to Measure and Draw a Floor Plan
This post may contain affiliate links, which means that if you make a purchase, I might make a small commission at no extra charge to you. Please read my full disclosure here. As an Amazon Associate, I earn from qualifying purchases.
These 9 steps will help you draw a simple floor plan:
- Draw a sketch of your space
- Measure the overall length and width
- Take measurements of the remaining walls
- Measure doorways and other entries
- Measure the height
- Determine the size of the windows
- Measure architectural features
- Indicate the location of obstructions
- Share Your Measurements or CAD up yourself
For more details and explanations of each step see below. You’ll find a step-by-step guide on the tips and tools you need to measure and draw a floor plan.

Floor Plan 101 Supplies
Be sure your metal tape measure is at least 25 ft. (forty feet is better). That size will allow you to measure the total width and length of the room.

It’s always a good idea to have a friend help you measure. The measurement will be more accurate when two can hold the tape straight.
You can also use a laser measure tool but you will need the tape measure for shorter areas, windows, and doors.

Steps To Draw A Floor Plan
1. Draw a sketch of your space
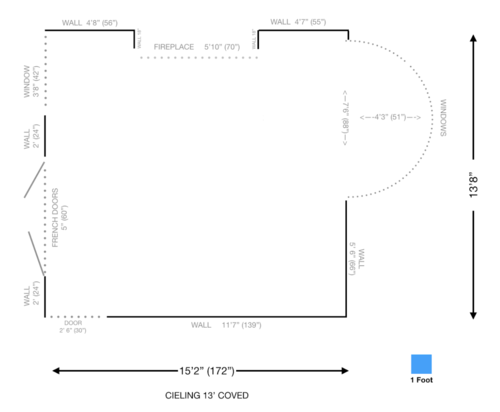
The first step is to draw a sketch on graph or blank paper of all the architectural details of your space. This includes windows, doorways, fireplaces, openings, etc. This doesn’t need to be a work of art or perfectly to scale.
To get started a quick sketch does the trick if you do not have printed floor plans of your space! All of this information will help to create a design with pieces that fit perfectly into your space. (see below)

You can draw it in pencil, so you can easily erase it! It’s more important your measurements are accurate. (see below)

2. Measure the overall length and width
Using a tape measure, measure along the baseboard the length of one wall, from one corner of the room to another. Start by measuring the overall LENGTH and WIDTH of the room.
We will add smaller measurements afterward. The smaller measurements will add up to our overall width and length.
3. Measure the remaining walls
Next Measure the remaining walls the same way you measured the first. Most rooms have four walls, but if you’re measuring an L-shaped room, you have more to measure.
*** Make sure to include every wall in your sketch! ***
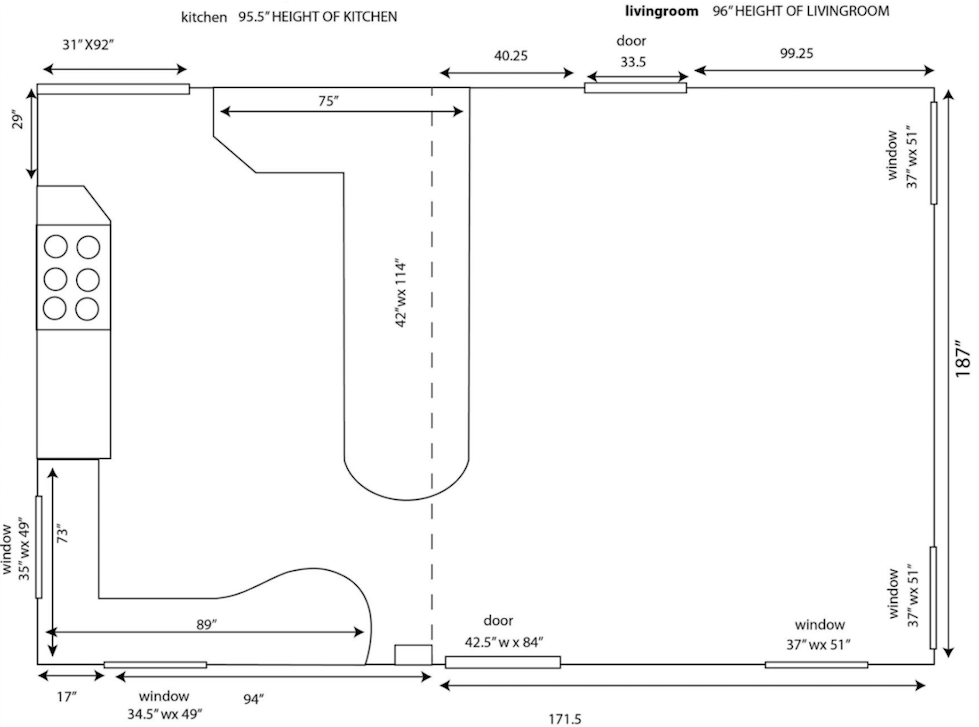
4. Measure doorways and other entries
Measure the room’s doorways and other entries. Note whether the door opens into or out of the room.
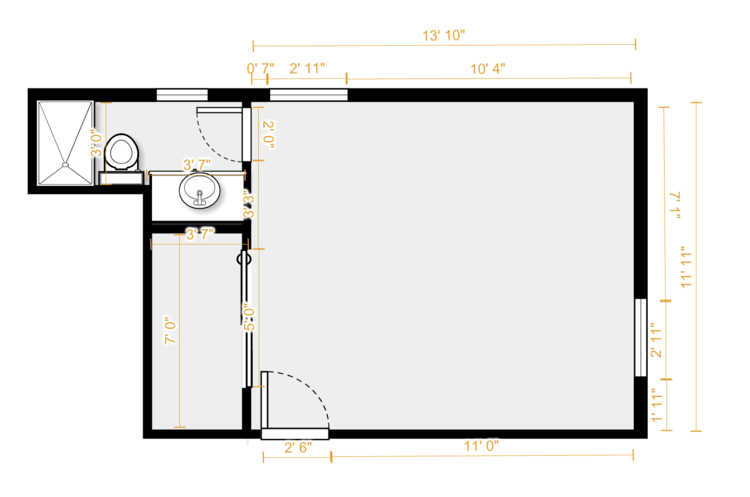
Don’t forget to measure the distances of all openings to hallways and open archways! (See computer rendering below)


5. Measure the height
Measure the height of the room from floor to ceiling, and include heights of key openings too if they will affect the layout.
6. Measure windows
Determine the size of the windows by measuring the window frame from the outside edge to the outside edge.
Be sure to include the measurement from the window (on each side) to the corner of the wall (or next window or opening).
7. Measure architectural features
Measure any and all architectural features, including fireplaces, brackets, shelves, and any other built-in features.
Note and measure the height and width of anything you’ll need to work around.
- Windows ( width, height, and height from the floor)
- Doors ( door width and height)
- Outlets and Switches
- Air ReturnsLight Fixtures
- Ceiling Height
8. Indicate the location of any obstructions
Lastly note where heat and air conditioning ducts, radiators, coverings for electric wires and plumbing pipes, and exposed pipes are located.
This step is optional but encouraged if there are any “obstacles” that could affect the design.

9. Share Your Measurements
If you’re moving onto eDesign or working with a designer you can take a picture of the measurement floor plan or scan it to email and share your measurements.
For the DIYer
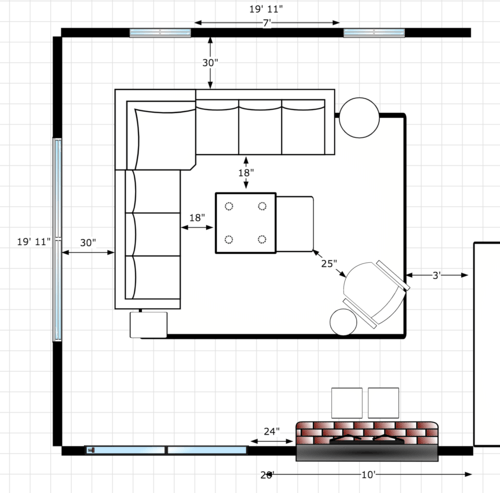
If you are a computer-savvy DIYer you can go to the ICOVIA website and create an image of your floor plan as shown below.

You can also use the FREE room planner on the Westelm or Bassett Furniture websites.

Once the measurements are in you can then use the populated furniture to plan your space to scale. The below video will walk you through how to create a floor plan in the Bassett program.
It’s super easy and you can save your floor plan after you create an account. Doing so will allow you to go back to the floor plan as you tweak your design.
To make it even easier I created a PDF download you can print out and follow while taking your measurements. Just add your name and email address to get access to the handy guide.
Helpful tips to remember as you plan out your space:
- Give 30″ to 36″ of a walkway between large furniture pieces (if your living room allows for it) if not then at least 18″-24″.
- Make sure there is no less than 3.5′ and no more than 10′ of space between seating.
- If possible sofas should never be flush to the wall. Pull it out 3-5″ and give it some breathing room.
- Your coffee table should be at least half the length of your sofa and should be no more than 4″ higher or shorter than the top of your sofa seat cushions.
- 16″ to 18” is the ideal distance between the sofa and coffee table.
- Your area rug should be large enough for at least the front legs of the sofa and all chairs to rest on top of it.
- Side tables should be no deeper than the depth of the sofa and keep your side table close enough to set down a drink with ease. Which is typically 2-3″ from the height of the arm.
- Accent Chairs should have around 42” (size of your room willing) between a set of living room accent chairs to be able to fit a small table in the middle. For a smaller room just place chairs side by side.
- When pairing a sofa and accent chairs choose seat heights that are within 4″ of each other.
- Make sure your console is the same height or a few inches shorter than the back of your sofa. It should also ideally have about 6″ of space on either end.
- The distance between the TV and sofa should be about 7′ and the optimal height for the center of the screen is 30 inches above the lowest seat height in the room.
Pin For Later

Furniture Delivery Tip
Any furniture you buy should have some clearance around it and should be at least 4 inches less than the passage measurements. This will allow you or the furniture delivery people to move it easily
Pro Tip: Any furniture you buy should have some clearance around it and should be at least 4 inches less than the passage measurements. This will allow you or the furniture delivery people to move it easily.
This is just a basic guide to get you started in your design planning stage. I hope this post helps you design a home you love!
Remember this is just the first step in the interior design journey!
This post is all about how to measure and draw a floor plan.
Other Posts You’ll Love:
- 5 Best Room Design Budget Printable Freebies
- 11 Best Modern Interior Design Styles (Shop The Look)
- Living Room Interior Design Styles: Ultimate Guide To Finding Yours
Last Updated on April 7, 2025 by Nicole DelaCruz


